Bootloader


What you will learn:
In this tutorial, you will learn to use the bootloader feature offered by Luos engine.
1. Acquire and set up your equipment
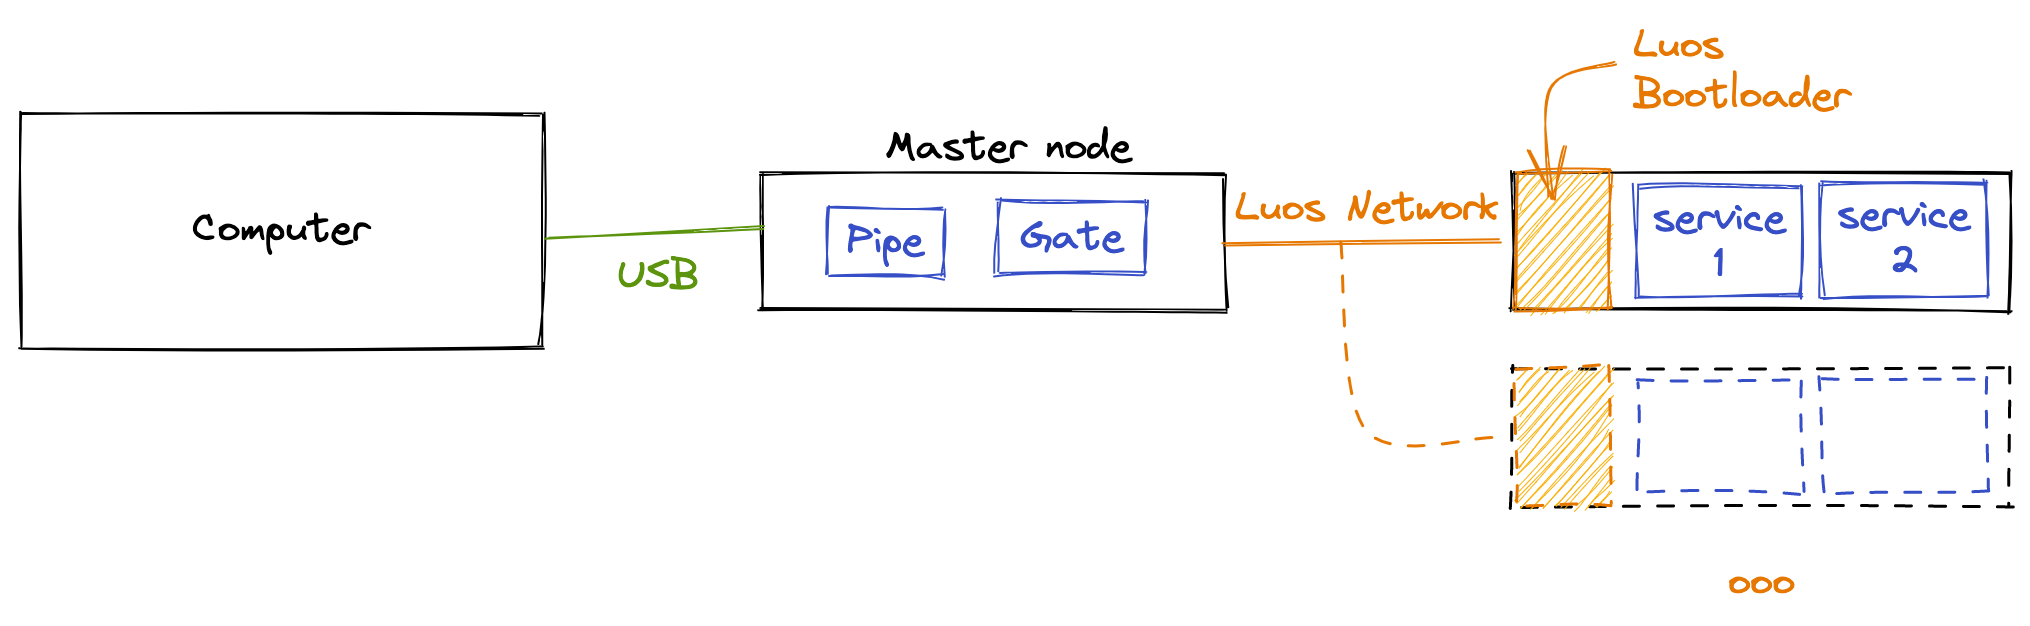
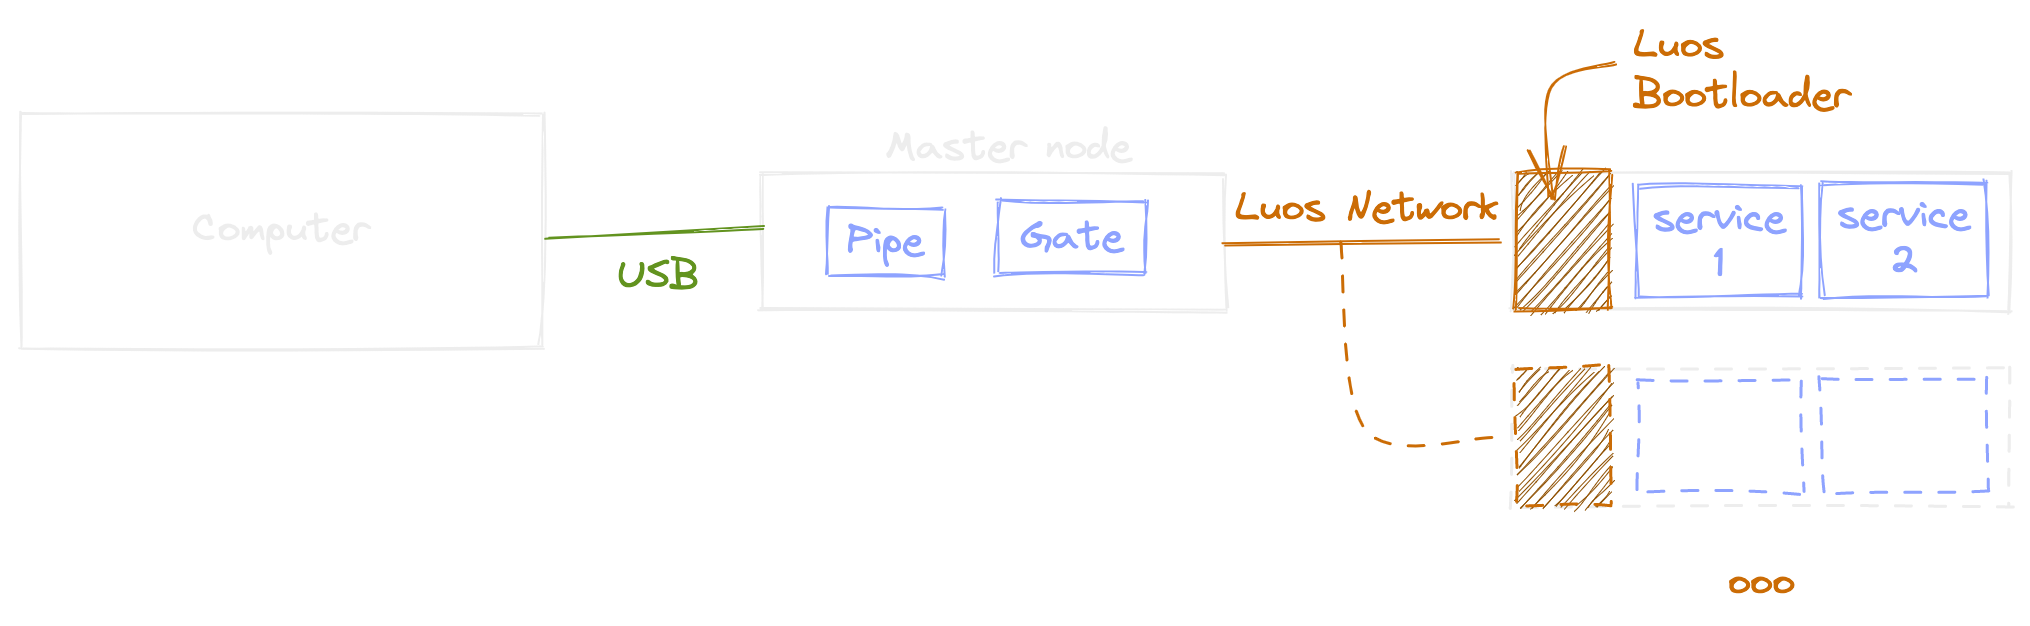
To flash one or multiple boards using the Luos engine's bootloader, you need a master board that will manage the link between your computer and the Luos network. So the minimal setup needed to use the bootloader is composed of two boards supported by Luos engine connected together with a Luos network. We will use one of these nodes as a "master" with a gate and the other will be able to be updated through the Luos network by hosting a bootloader.
If you are not comfortable with the Luos network creation and Luos engine's firmware management and compiling, please follow the Luos Get started tutorial first.
It is not possible to update the firmware on the master board running the gate using the bootloader feature. If you want to update it, you will have to flash it using a direct link (DFU, STLink, JTAG, ...) to the board.
On this tutorial, we will use the examples available in the Luos engine's repository. You can download and unzip it or clone it using:
Git clone https://github.com/Luos-io/luos_engine.git
2. Load the master board with a gate program
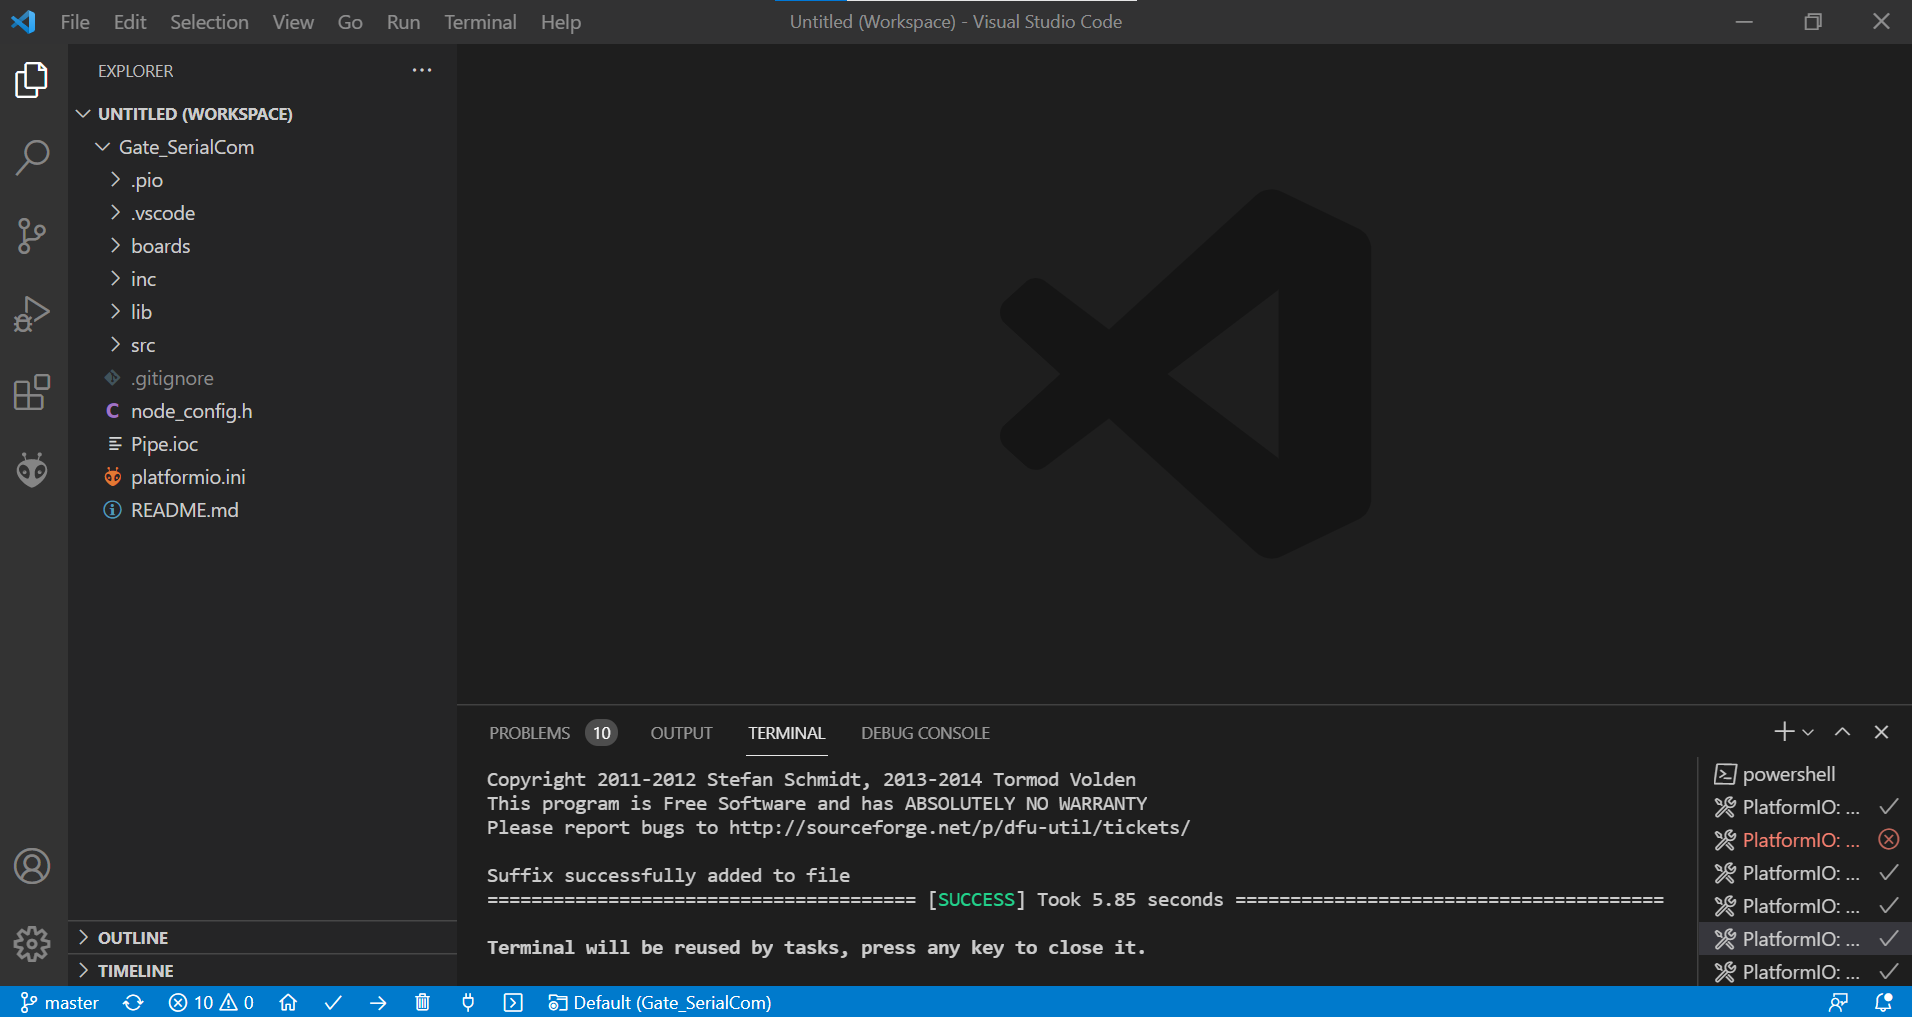
Open VS Code and open the Gate_SerialCom project corresponding to your master board in Luos_engine/Examples/Projects/YOUR_BOARD:
Now connect your master node with a USB cable from your PC to the port used for programming.
Click on Upload on the bottom left corner of the IDE. Wait for the compilation and flashing to be completed. If successful, you should see the following:
If this step fails, check that you are properly connected to the USB port, or try to follow the Luos Get started tutorial.
3. Detect the gate's node with the CLI
Now you should be able to detect your master node with the CLI using the following command in a terminal:
pyluos-bootloader detect
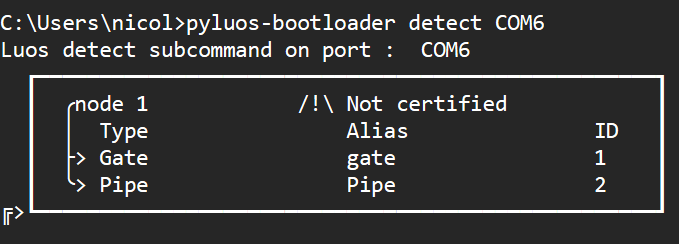
COM6 is the identifier of the serial port used. It is unique for each shield; you can check yours with the Device Manager in Windows or ls -l /dev/ | grep ttyUSB on Linux. If you do not provide it, pyluos-bootloader will try to find an available gate in your system.
4. Load the bootloader
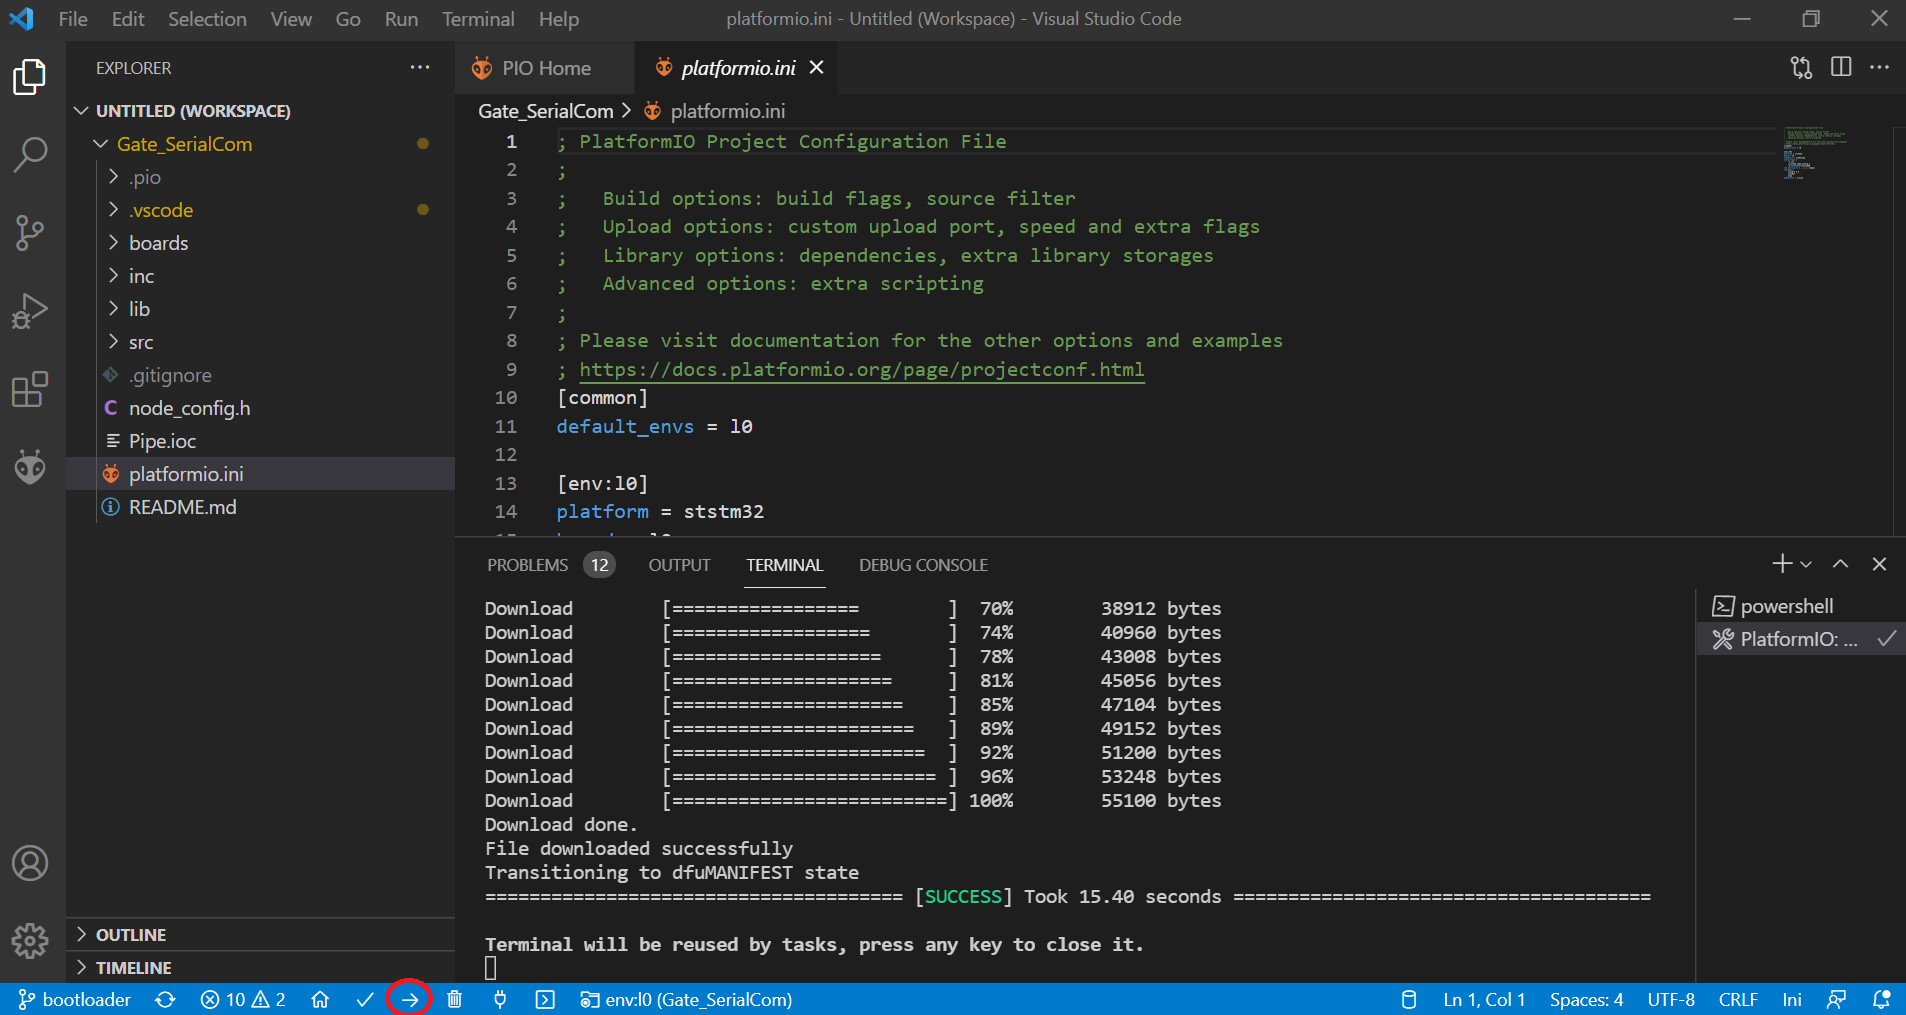
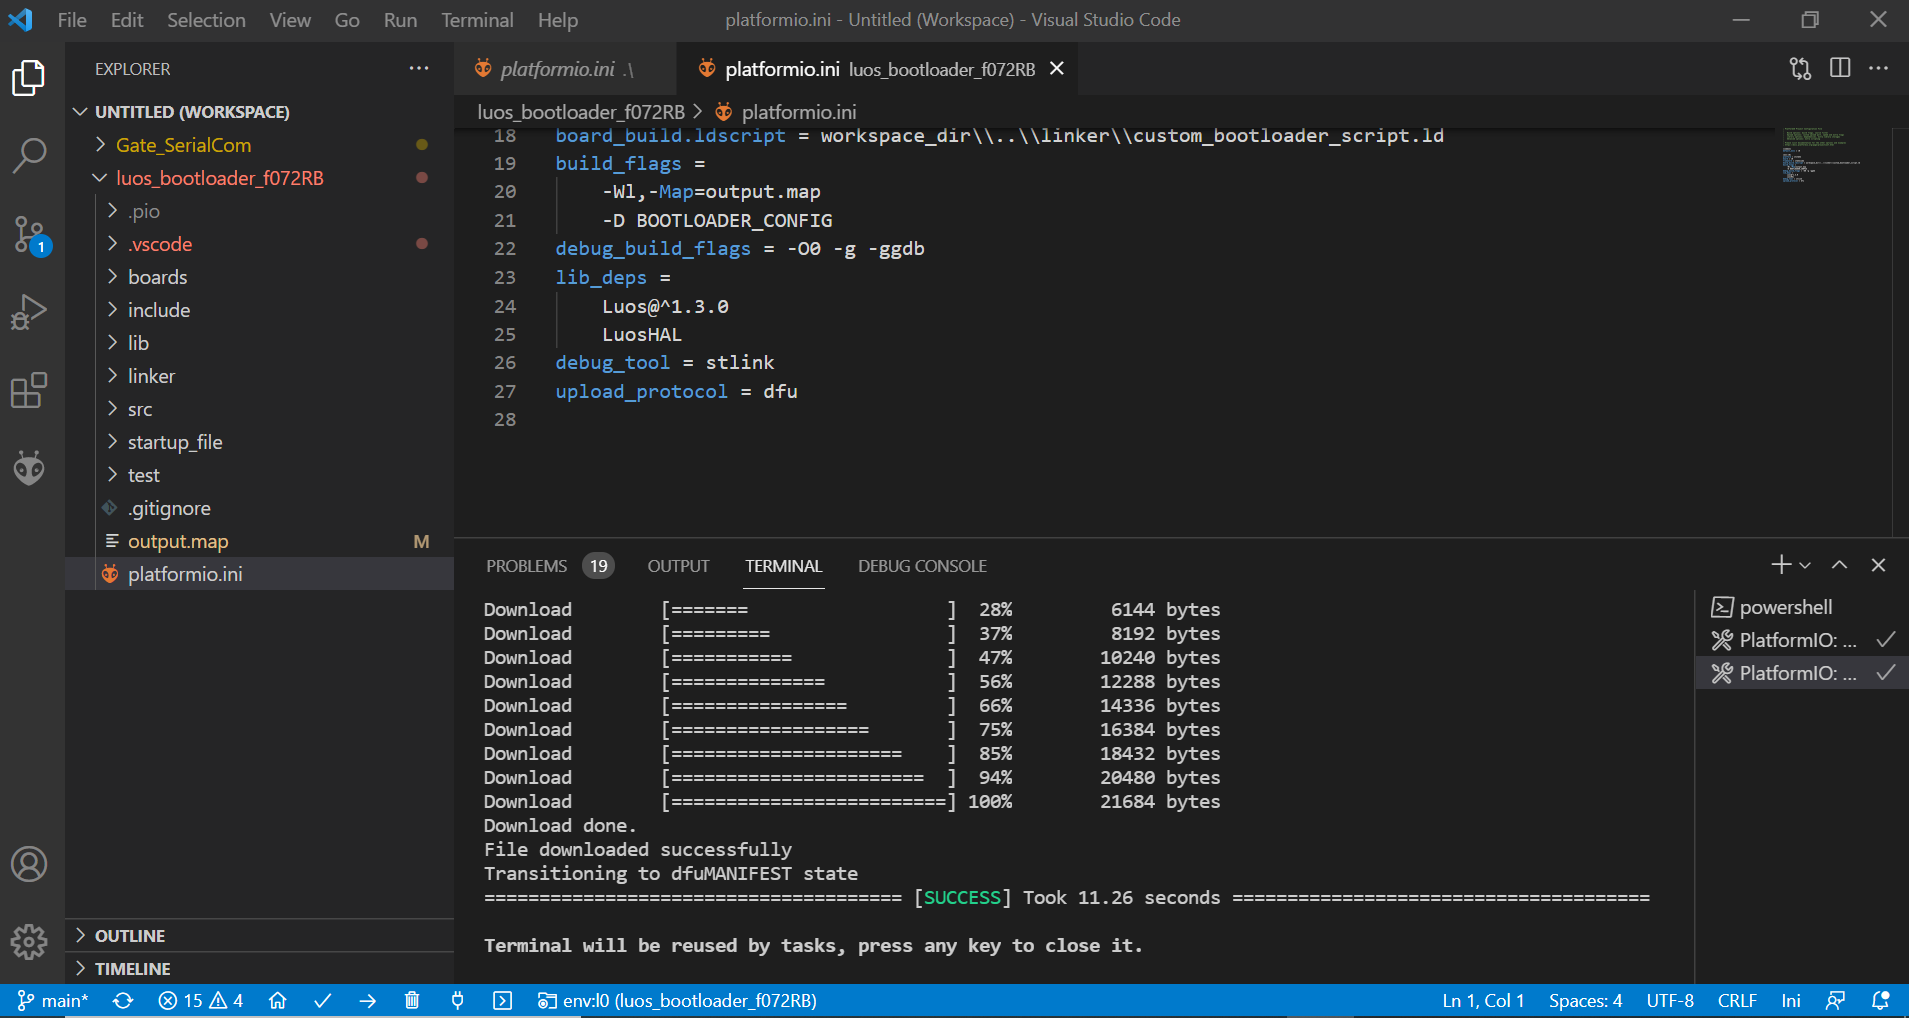
Now, you will load the bootloader in the second node. Follow the same process as described in Step 2, but this time open the Bootloader example in Luos_engine/Examples/Projects/YOUR_BOARD.
Connect the second node with the USB programming port and click on Upload; you should see the following:
5. Detection
Connect your two nodes through the Luos network and connect your master board USB serial interface to your PC. Type the same command used on Step 3, and you should see the following:
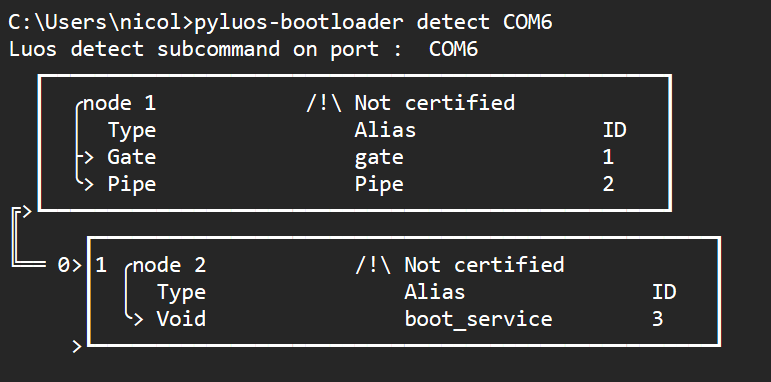
boot_service indicates there is a bootloader running on your node. You are now able to communicate with it through the gate and load any application.
6. Compile an app compatible with the bootloader
Most of the examples available in Luos engine's folder are already compatible with the bootloader's feature. You will be able to use them as templates for your future applications. Follow the same process described in Step 2 and Step 4, but this time open the Button example in Luos_engine/Examples/Projects/YOUR_BOARD.
PlatformIO is able to manage multiple build configurations. By default, Luos engine's examples are compiling a firmware that can be loaded using the standard flash system. If you want your application to be bootloader-compatible, you need to compile it in with_bootloader mode.
To do that, when your button project is open you can click on the Switch PlatformIO Project Environment button at the bottom of the window, then select the with_bootloader option on the list of choice appearing on the top of your screen.
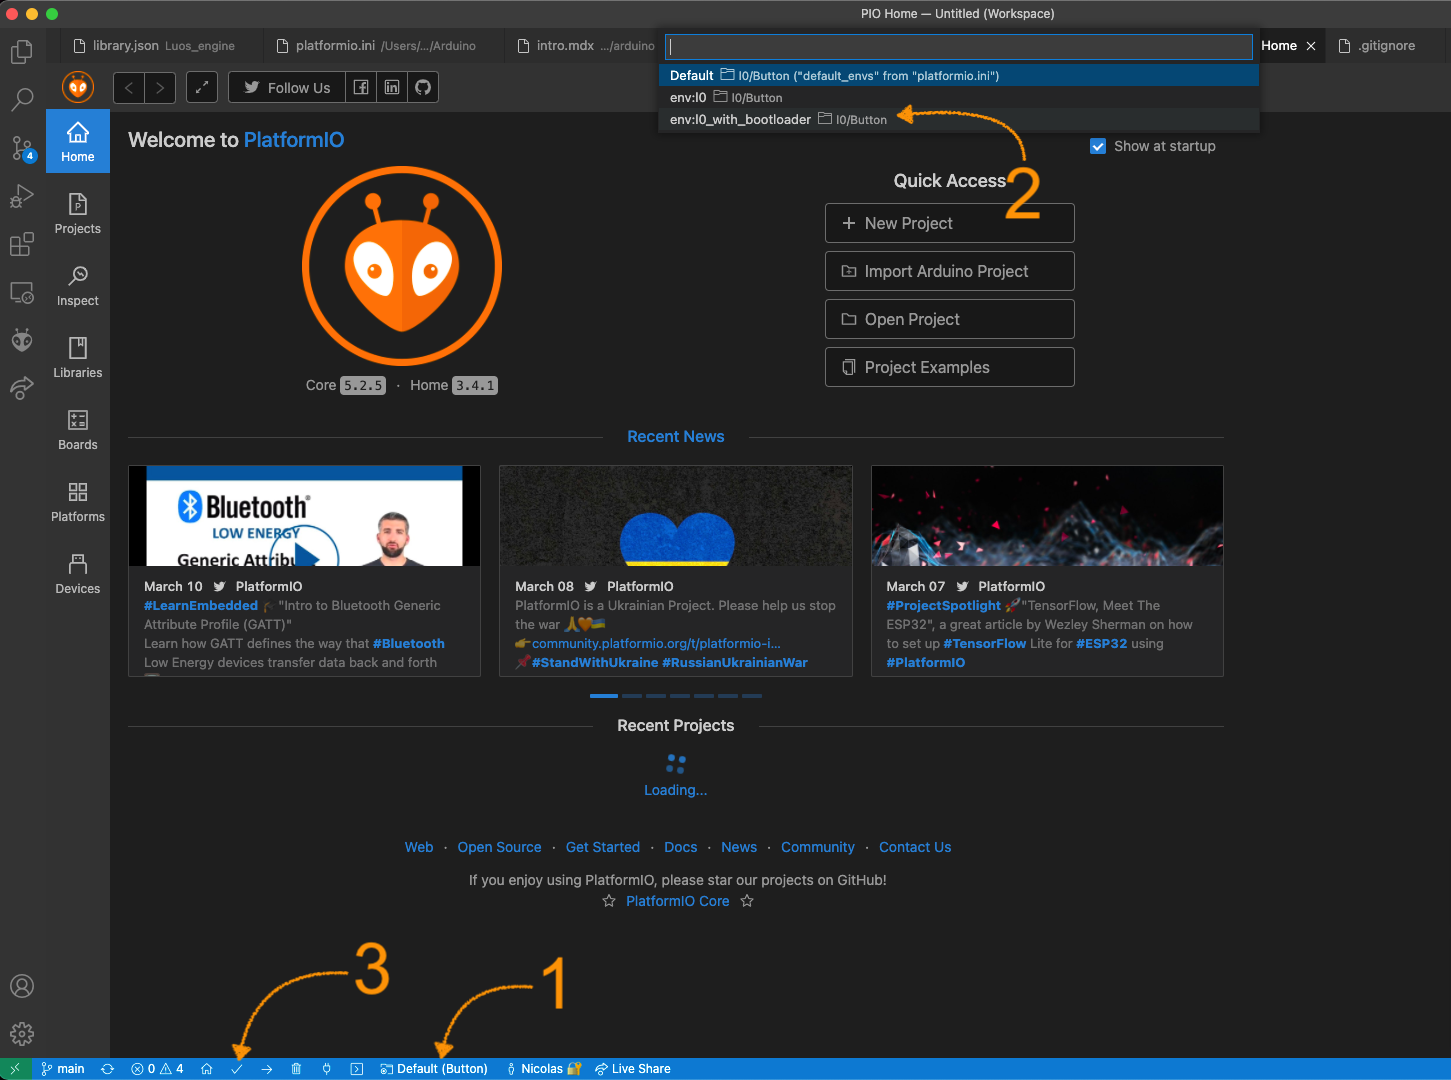
Then, click on Build.
If you click on the Upload button, PlatformIO will use the Luos bootloader CLI to load your firmware. For now, please be sure to do it in command line instead, like explained below.
The generated binary file can be found in Luos_engine/Examples/Projects/YOUR_BOARD/Button/.pio/build/*_with_bootloader under the name firmware.bin.
Now, you can use the bootloader's command line to load it, for example:
cd Luos_engine/Examples/Projects/l0/Button/.pio/build/l0_with_bootloader
pyluos-bootloader flash COM6 -t 2 -b firmware.bin
For further information on the options used with the CLI, please read the dedicated documentation page, or type the following command:
pyluos-bootloader --help
The following lines should appear after typing the command:
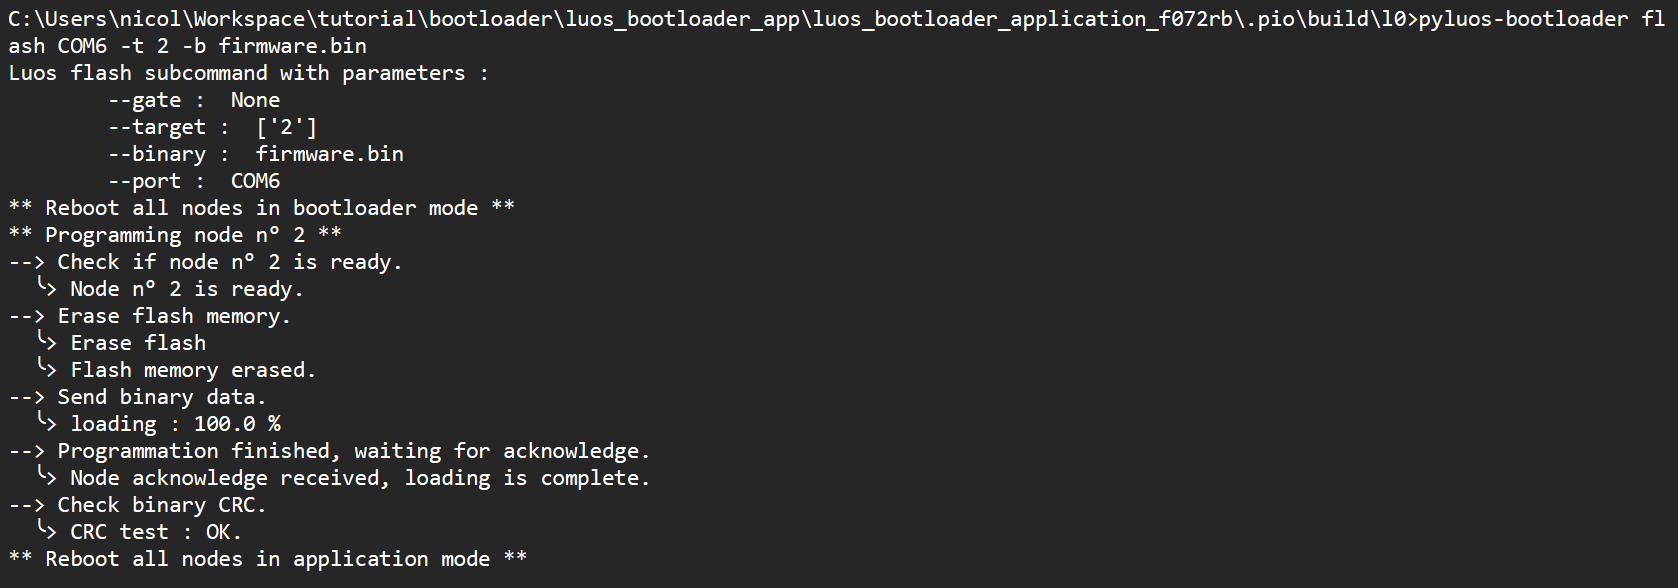
If any problem occurs during the loading process, please reboot your system and retry typing the command (you can also find information here).
Then relaunch a detection (as done in Step 3):
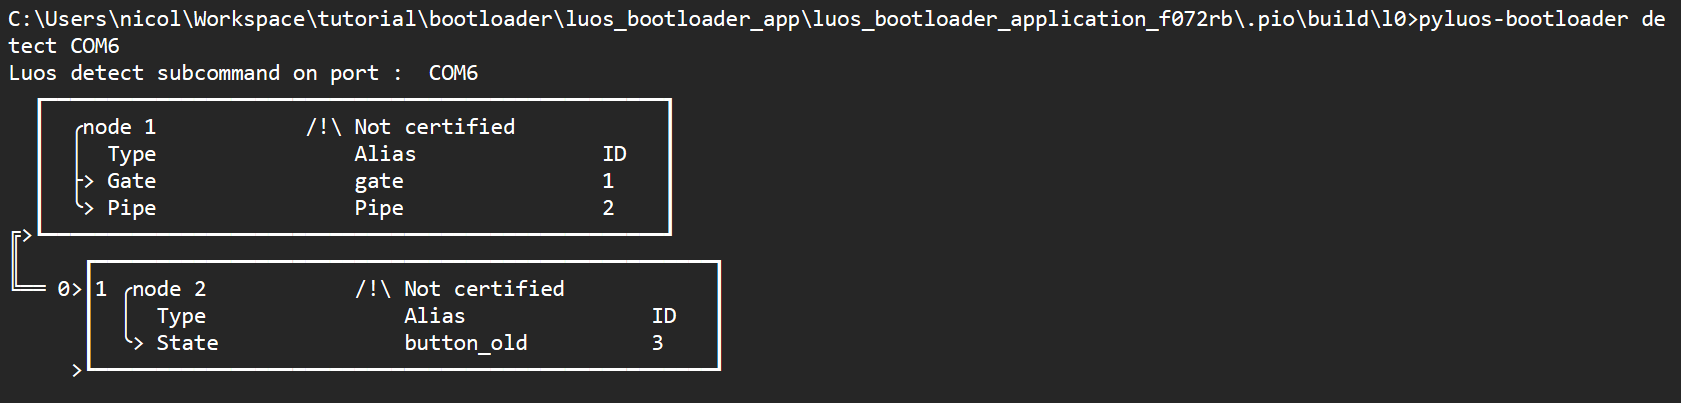
You can see that boot_service has been replaced by another alias such as button, which is the name of the service running in your app: the bootloader switched to application mode and launched your freshly written app.
7. Update your app
You can also update your app and reload it in the node.
As an example, select a Led project and follow the previous steps with the Button example.
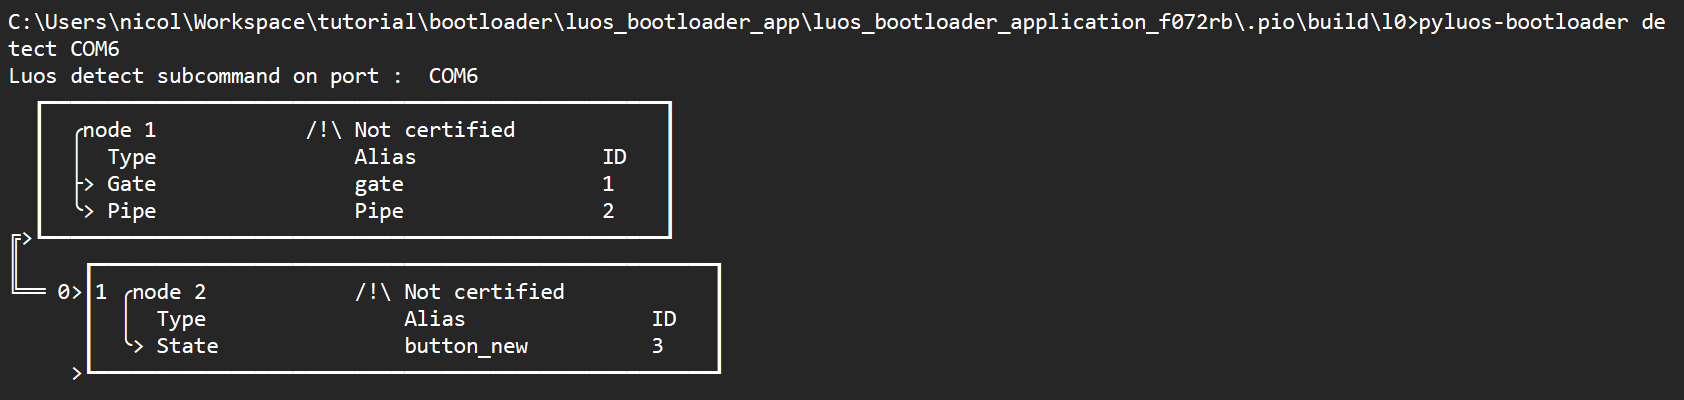
Compile it using the with_bootloader environment, then use the bootloader command to flash it.
You should see your updated service running in your node:
You have reached the end of this tutorial. You are now able to use the bootloader's feature included in Luos engine. You know the basics, but you can find some more helpful information on the dedicated documentation page.