Your First Service


What you will learn:
You just finished the Get started and you want to go further with Luos? This tutorial is made for you!
Part 1: Luos service
1. Introduction
In the Get started tutorial, we learned to perform the following essential actions:
- Set up the embedded environment to make a basic Luos-LED-blinking project.
- Control of your microservices with high-level API and set up the Python environment.
- How to spread microservices across multiple boards on a network while keeping the exact same behavior with Luos engine.
Upon finishing the Get started, you can grab what a microservice represents into an embedded system. However, Luos still remains black magic to you.
Let us demystify it by helping you to make first service code!

2. Environment
Clone or download the training repository.
In PlatformIO IDE, open the folder corresponding to your board in Training/1_First_Service/Work_base from the repository you just cloned or downloaded, and connect the board to your computer with a USB cable.
- Check that the right environment is selected, then compile and upload the project to the board (right arrow button in the bottom left of the window).
- Using a terminal and the
pyluos-shellcommand, you should see:
      ┏━━━━━━━━━━━━━━━━━━━━━━━━━━━━━━━━━━━━━━━━━━━━━━━━━━┓
      ┃  ╭node 1            /!\ Not certified            ┃
      ┃  │  Type                Alias               ID   ┃
      ┃  ├> Pipe                Pipe                2    ┃
      ┃  ├> Gate                gate                1    ┃
      ┃  ╰> Unknown             blinker             3    ┃
    ╔>┗━━━━━━━━━━━━━━━━━━━━━━━━━━━━━━━━━━━━━━━━━━━━━━━━━━┛
You are ready to go!
3. Create your first service
Now, let's learn how to create your own service. To understand how to do it, we will create a simple LED service that you will be able to use the same way you were using it in the Get started.
At any time, you can check the solution in the folder Training/1_First_Service/Solution, but no cheating! This is only for emergency situation...
A service is an encapsulated feature defining an API and allowing other services to interact with it (see the documentation).
In the case of a simple LED, your service will have one input with the state of the IO that turns the LED on or off:

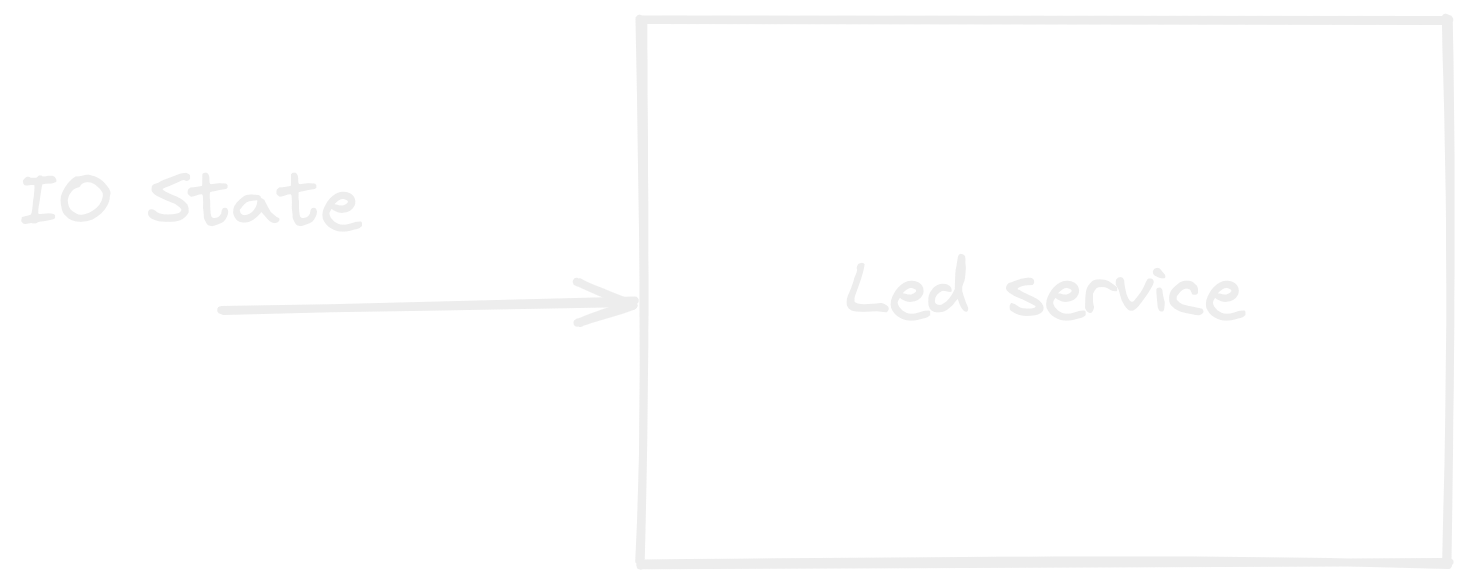
In your service code, you will have to give the order to turn the LED on or off depending on the received IO state message. So you need a function to be called when another service sends a message, so that this function deals with the LED; this type of function is called a callback.
You can now declare your LED callback functions at the beginning of the file main file located in the /src/ folder (we will see later how to deal with this function).
Throughout this tutorial, you will have to locate the right lines where to copy/paste the new code line(s) we provide to you, into your C file (Nucleo) or your INO file (Arduino). It is explained below with a comment before the lines to locate for this first case, but after that we will let you locate on your own the right place to put the code. Of course we will continue providing the few lines of code situated just before the code you have to add to the files.
// the code to locate:
#include <luos_engine.h>
#include "blinker.h"
#include "pipe.h"
#include "gate.h"

// the new line to copy and paste
void Led_MsgHandler(service_t *service, msg_t *msg){}
So that your service can be recognized by other services, you will need to expose some information about the features you want to encapsulate into it:
- The service type, which defines the capabilities and the purpose of your service. You can find the list of all the Luos types in this page. Our new service fits with the STATE_TYPE (boolean 1 or 0).
- The service alias, which is the default name of your service. Let's name our LED “led”.
- The service revision, which is the firmware version of your service. Let's say our firmware has the version 1.0.0; we have to make a
revision_tvariable to send it.
Now that we have everything we need to create our service, we will begin by creating the LED service directly after the initialization of the other services, into the initialization of your code and using the Luos_CreateService function:
- Arduino
- Nucleo
void setup()
{
    Luos_Init();
    Pipe_Init();
    Gate_Init();
    Blinker_Init();

    // the two new lines to copy and paste:
    revision_t revision = {1, 0, 0};
    Luos_CreateService(Led_MsgHandler, STATE_TYPE, "led", revision);

}
int main(void)
{
    HAL_Init();
    SystemClock_Config();
    MX_GPIO_Init();

    Luos_Init();
    Pipe_Init();
    Gate_Init();
    Blinker_Init();

    // the two new lines to copy and paste:
    revision_t revision = {1, 0, 0};
    Luos_CreateService(Led_MsgHandler, STATE_TYPE, "led", revision);

    while (1)
    {
        Luos_Loop();
        Pipe_Loop();
        Gate_Loop();
        Blinker_Loop();
    }
}
By adding these few lines to your code, you just created your first service. For now, this service doesn't do anything because it is empty, but you still can see and access it by lauching a detection:
- Save the file, then compile and upload the project to the board.
- Using the command
pyluos-shellin a terminal, you should see the following routing table:
    ┏━━━━━━━━━━━━━━━━━━━━━━━━━━━━━━━━━━━━━━━━━━━━━━━━━━┓
    ┃  ╭node 1            /!\ Not certified            ┃
    ┃  │  Type                Alias               ID   ┃
    ┃  ├> State               led                 2    ┃
    ┃  ├> Pipe                Pipe                3    ┃
    ┃  ├> Gate                gate                1    ┃
    ┃  ╰> Unknown             blinker             4    ┃
  ╔>┗━━━━━━━━━━━━━━━━━━━━━━━━━━━━━━━━━━━━━━━━━━━━━━━━━━┛

The blinker service will be able to find your LED service thanks to the description information you provided. But for now, your LED doesn't react yet to the blinker service commands.
4. Manage the LED on your service
To control the LED, we now need to configure the LED's GPIO pin. To set a value to a GPIO pin on a MCU, you must configurate it as an output; this way we can switch a LED on or off.
Add your PIN configuration next to the service initialization in the same file:
- Arduino
- Nucleo
void setup()
{
    Luos_Init();
    Pipe_Init();
    Gate_Init();
    Blinker_Init();

    revision_t revision = {1, 0, 0};
    Luos_CreateService(Led_MsgHandler, STATE_TYPE, "led", revision);

    // the new line to copy and paste:
    pinMode(LED_BUILTIN, OUTPUT);

}
int main(void)
{
    HAL_Init();
    SystemClock_Config();

    // the new line to copy and paste:
    MX_GPIO_Init();//Nucleo Led Pin init

    Luos_Init();
    Pipe_Init();
    Gate_Init();
    Blinker_Init();
    revision_t revision = {1, 0, 0};
    Luos_CreateService(Led_MsgHandler, STATE_TYPE, "led", revision);

    while (1)
    {
        Luos_Loop();
        Pipe_Loop();
        Gate_Loop();
        Blinker_Loop();
    }
}
As we mentioned previously, our LED service needs to react at the reception of an IO state message. To do that, we created earlier a callback function (Led_MsgHandler) called by Luos engine when another service sends a message. So to make the LED service work, we simply have to complete the Led_MsgHandler of our service (see below). This will allow the LED service to use the messages sent by the blinker service.
There are two arguments in the callback function Led_MsgHandler:
A service pointer (the LED service): We will not use it in this tutorial, but keep it in mind for later.
A message pointer (msg): This is the actual message you receive with all the information the other service wants to give you. You will be able to get the LED state from the data of this message.
To control the LED depending on the message data, you can fill the content of the callback function Led_MsgHandler where you pasted it at the beginning of your main file (Arduino.ino or main.c)
- Arduino
- Nucleo
void Led_MsgHandler(service_t *service, msg_t *msg)
{
     // the block to copy and paste:
      if (msg->data[0] == 0)
      {
          digitalWrite(LED_BUILTIN, false);
      }
      else
      {
          digitalWrite(LED_BUILTIN, true);
      }
}
void Led_MsgHandler(service_t *service, msg_t *msg)
{
    // the block to copy and paste:
    if (msg->data[0] == true)
    {
        HAL_GPIO_WritePin(LED_GPIO_Port, LED_Pin, true);
    }
    else
    {
        HAL_GPIO_WritePin(LED_GPIO_Port, LED_Pin, false);
    }
}
Compile and upload the project to the board. You should now see the LED blink at the frequency decided by the blinker service.
The blinker service will send a message at the blink frequency you want the LED to change state (ON/OFF). When a message is sent to the LED service, Luos engine will call the message handler so that your code makes the LED react.

5. Secure your input data
Thank's to our callback function Led_MsgHandler, our service is now able to react to any input message. However, we don't want it to react to any message, but only to IO state messages. To make sure we use the data appropriately, it is better to use message types that are specific to the data in the command field of the message.
To do that, let's add a filter on the message command:
- Arduino
- Nucleo
void Led_MsgHandler(service_t *service, msg_t *msg)
{
    // the new line to copy and paste:
    if (msg->header.cmd == IO_STATE)
    {
        if (msg->data[0] == 0)
        {
            digitalWrite(LED_BUILTIN, false);
        }
        else
        {
            digitalWrite(LED_BUILTIN, true);
        }
    }
}
void Led_MsgHandler(service_t *service, msg_t *msg)
{
    // the new line to copy and paste:
    if (msg->header.cmd == IO_STATE)
    {
            if (msg->data[0] == false)
            {
                HAL_GPIO_WritePin(LED_GPIO_Port, LED_Pin, false);
            }
            else
            {
                HAL_GPIO_WritePin(LED_GPIO_Port, LED_Pin, true);
            }
        }
}
Using conditional statements, you will also be able to manage multiple types of input messages so that the services react differently depending on the command they receive.
6. Luos Package
We successfully created a simple service in our main file. But this service doesn't look like the other one already present on your project yet.
If you want to move your service into another project, you will have to directly copy your code from one main program to another. Also, if you want to have multiple services, your code may quickly become a mess!
That is why we recommend creating Luos engine's packages to solve these issues.