Part 4: connect to a web app
1. Introduction
In the previous parts of the Get started tutorial, we used Luos Python SDK (Pyluos) to be able to code the behavior of your embedded device from your computer. This SDK needs the gate application to translate JSON to Luos and Luos to JSON.
The gate translates everything on JSON allowing you to take control of your device from any language.
Luos also provides various web tools to manage your products. Let’s try one of them!
To deal with these SaaS tools, you will need an application different than the gate, called the inspector. The inspector will be directly sending binary data instead of JSON.
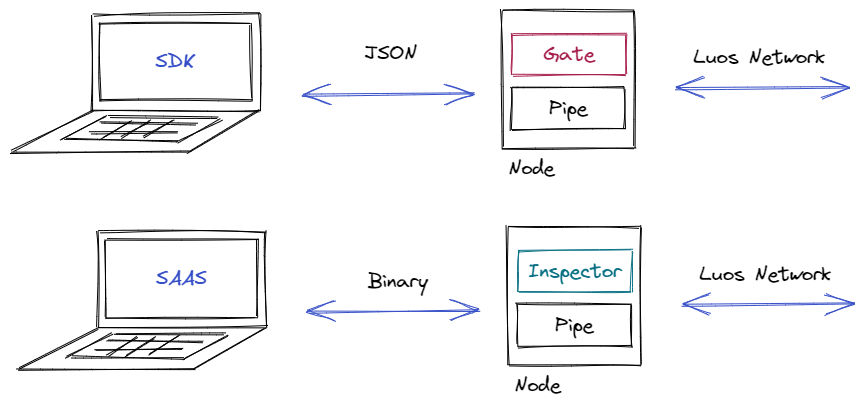
In this part, we will learn how to add an inspector to your system, interface it with the Luos tools, and visualize some information on your browser.
2. Add an inspector to your project
We will use the same board from the first three parts. You can do this part if you have only one board.
If you've just finished the Get started Part 3, replace the gate with the inspector on the board connected to your Serial USB. Leave your setup as it is and just unplug the USB cable!
In VS Code, open the folder from the Get_started corresponding to the board you use.
From the left panel, find and open the file src/main.c or src/Arduino.ino.
Replace the header gate file
gate.hby the inspector fileinspector.h:...
#include "blinker.h"
//#include "gate.h" <== comment this line
**#include "inspector.h"**
#include "led.h"
#include "luos.h"
#include "pipe.h"
...Comment the two lines
Gate_Init();andGate_Loop();to remove the gate service from this board, and add the inspector service functionInspector_Init();andInspector_Loop();:...
Luos_Init();
Led_Init();
Pipe_Init();
Inspector_Init();
//Gate_Init();<== comment this line
Blinker_Init();
...
Luos_Loop();
Led_Loop();
Pipe_Loop();
Inspector_Loop();
//Gate_Loop();<== comment this line
Blinker_Loop();
Those lines trigger the initialization and loop execution of all the packages in your project.
- Check if the proper board environment is selected depending on your board:
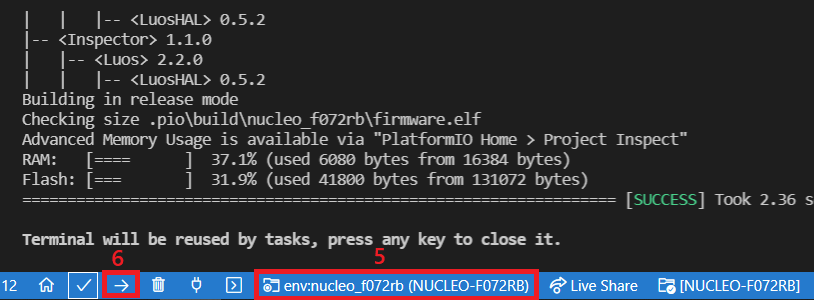
- Build and flash by clicking on the arrow pointing to the right on the bottom left in VS Code.
If you run Luos on your computer, just compile and run using:
./.pio/build/native/program
3. Connect to Luos Network Display
Open the tool Luos Network Display
Use Microsoft Edge or Google Chrome as a browser, Firefox is NOT COMPATIBLE YET.
- Click on Network Display to visualize your project
You may need to log in to use the Network Display feature.
- Click on Launch Detection:

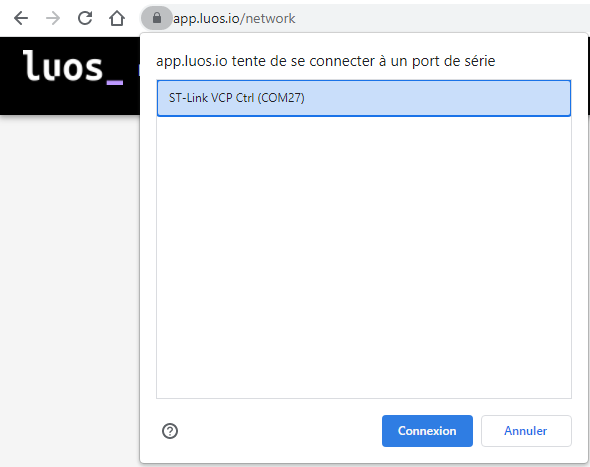
- You should see a selection menu appear. Select The Serial COM where the USB cable is plugged into the board, and click on the Connexion button.
- Click again on Launch Detection.
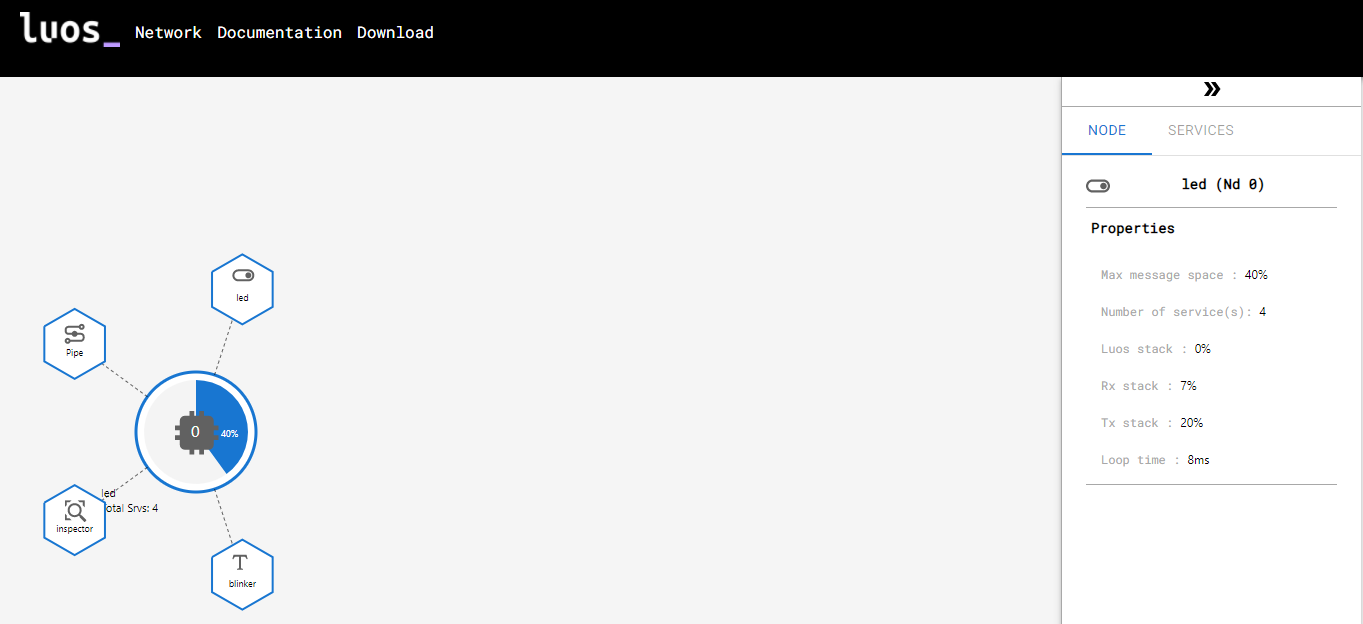
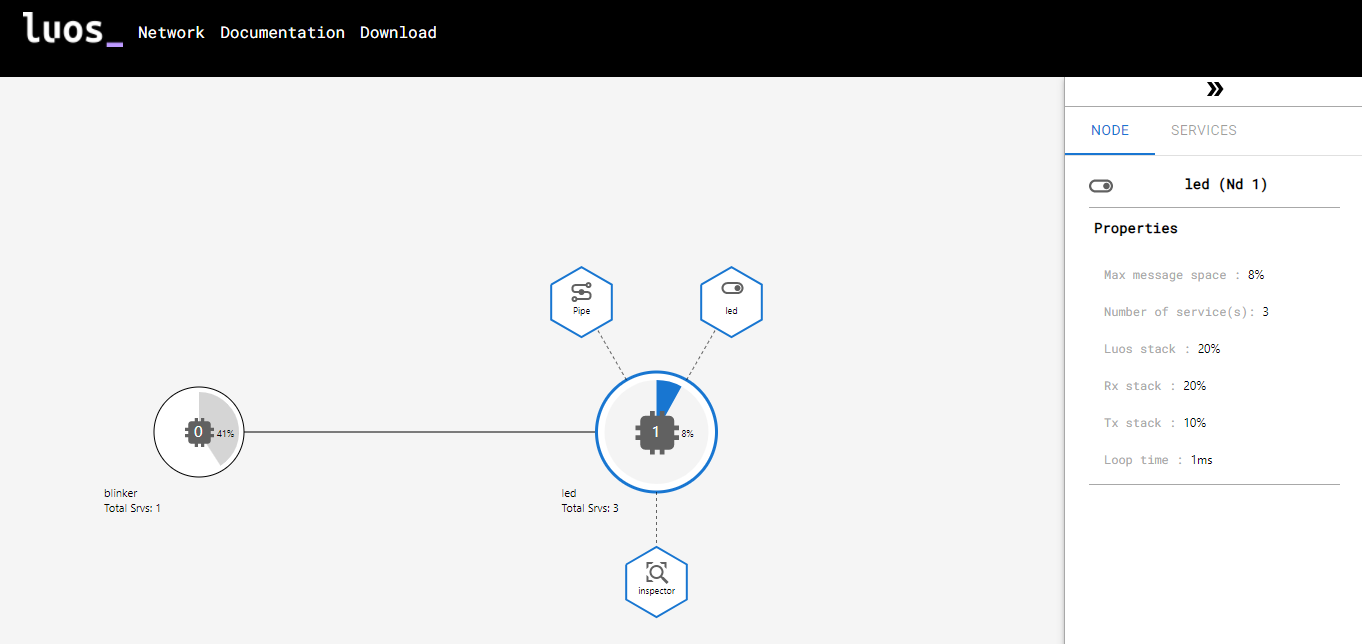
- The Network interface recovers the information from the inspector and displays your nodes and services. Click on the node to see all services in it:
4. Check your Luos network using the Luos Network Display tool
At this point, you must have 2 boards connected through a Luos Network. If this is not the case, check the Part 3 of the Get started and ensure you followed the steps properly.
Flash the board 1
- In VS Code, open the folder from the project Get_started corresponding to your board 1:
file/open folder. - From the left panel, find and open the file src/main.c or src/Arduino.ino.
- Comment the lines
Blinker_Init();andBlinker_Loop();to remove the blinker service from this board:
...
    Luos_Init();
    Led_Init();
    Pipe_Init();
    Inspector_Init();
        //Gate_Init();
    //Blinker_Init();<== comment this line
...
    Luos_Loop();
    Led_Loop();
    Pipe_Loop();
    Inspector_Loop();
        //Gate_Loop();
    //Blinker_Loop();<== comment this line
- Check if the proper board environment is selected depending on your board
- Build and flash board 1 by clicking on the right arrow button in the bottom left in VS Code.
Flash the board 2
If you finished Part 3, just reconnect the GND wire on your second board. To Prevent any mistakes, unplug the USB cables of the boards before wiring 😉
Now unplug the USB cable of Board 1 and connect the USB cable of board 2. Then follow these steps:
- In VS Code, open the folder Get_started's project corresponding to your board 1:
file/open folder. - From the left panel, find and open the file src/main.c or src/Arduino.ino.
- Comment the lines
Blinker_Init();andBlinker_Loop();to remove the blinker service from this board:
...
    Luos_Init();
    //Led_Init();<== comment this line
    //Pipe_Init();<== comment this line
    //Inspector_Init();<== comment this line
        //Gate_Init();<== comment this line
    Blinker_Init();
...
    Luos_Loop();
    //Led_Loop();<== comment this line
    //Pipe_Loop();<== comment this line
    //Inspector_Loop();<== comment this line
        //Gate_Loop();<== comment this line
    Blinker_Loop();
- Check if the proper board environment is selected depending on your board
- Build and flash board 2 by clicking on the right arrow button in the bottom left in VS Code.
Detect with Luos Network Display:
- Go back to the Luos Network Display tool on your browser.
- Refresh the page. That should clear your previous topology.
- Click on Launch Detection again.
- Your COM port should already be set. If not, select the serial COM where the USB cable is plugged to the board. Then click on connexion.
5. Conclusion
Congratulation, you succeed to visualize your network on the Luos Network Display tool!
You can check out our tutorials in our Academy section to learn more about Luos and understand how to use the features of Luos technology. We also invite you to check out our documentation to learn more about the core concepts of Luos.
⭐ If you liked this tutorial, feel free to star our Luos engine repository⭐